The audio interface has become an indispensable staple in modern music and audio. Whether you’re talking about top-flight LA super-studios or your old university friend’s bedroom-cupboard producing cave, you’ll inevitably uncover an interface as the technological brains of a given audio-related operation.
And now, it’s your turn! Choosing a new audio interface is difficult enough, especially if its your first, but setting a new interface up for the first time can be even more daunting. Whatever your purposes for your interface, though, this will serve as a handy, loose guide to getting everything where it needs to be.
Here, we’ll be treating your new audio interface as your first audio interface - and assuming very little with regard to your prior knowledge of interfaces or recording. The examples given will be for a Reaper user on Windows 10 and a Logic user on Mac OS Ventura, but the principles remain essentially the same whatever your own setup. So, without further ado: here’s how to set up a new audio interface (with pictures!).
Step 1 - Unboxing
Naturally, you’ll need to get your lovely shiny new audio interface out of the box before you can do anything with it. In the box, you’ll find your interface, a power adaptor if it is powered independently, and the right cables for you to get started. Different interfaces may use different connection formats, but USB-C and its speedier Apple-borne twin Thunderbolt are currently the formats de rigeur - and USB-A the industry standard for older models. Find out more about the benefits of Thunderbolt vs USB audio interfaces with our guide.
Step 2 - Connecting to your computer
Some entry-level interfaces are practically plug-and-play, wherein they will upload their own drivers upon being plugged-in; most require a little software hand-holding first, though. But before you get to that, your computer will need to see your interface - so plug it in (while your computer is on).
Step 3 - Downloading drivers and software
In order for your interface to work properly with your computer, your computer needs to be in possession of the right device drivers. These small items of software are interfaces for your interface, and will be found on your interface’s brand website.
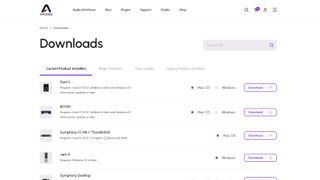
If you’re using Windows and can’t find a driver for your interface - an unlikely eventuality today - there is a third-party freeware alternative called ASIO4ALL which you can use instead. Macs have their own sound driver protocol in Core Audio, so this won’t be necessary if you’re Apple-folk.
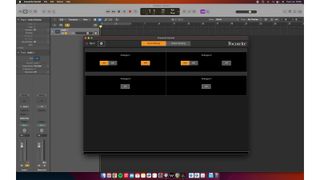
There are sometimes additional pieces of software you may need to install to access your interface’s features. For example, some Focusrite interfaces require you to use the Focusrite Control app to control input and output routing (as well as the ‘Air’ voicings for Clarett preamps).
Step 4 - Setting computer and DAW preferences
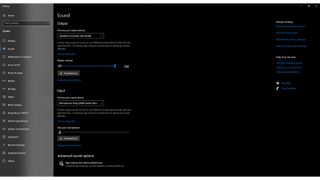
Given that your computer likely already has its own mic in/headphone out sockets and/or integrated speakers, you may need to tell your computer and audio software to use your interface instead. On Windows, you can do this by accessing System Settings, choosing Sound and selecting your interface in the drop-down boxes under Output and Input respectively.
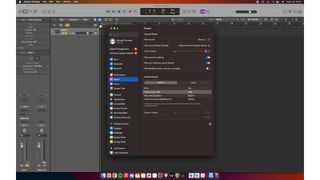
On a Mac, you can go to System Settings, navigate to ‘Sound’ and select your interface from the lists given.
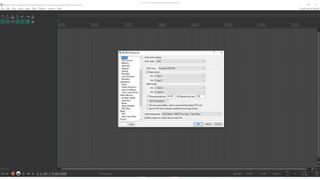
Each DAW is designed differently, but all will have some form of Preferences window where you can select the interface. In Reaper, for example, you can either navigate to Options>Preferences, press Ctrl+P or click the sample rate/bit depth information in the top-right. Here, make sure ASIO is selected from the ‘Audio system’ drop-down, then select your interface (or ASIO4ALL) from the ‘ASIO Driver’ drop-down.
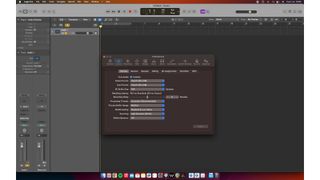
Meanwhile, in Logic, you can navigate to Logic Pro > Settings… > Audio… in order to be presented with a Preferences window, where you’ll see similar drop-downs.
Step 5 - Making connections
Next, it’s time to interface your interface with your speakers - if you have them, that is. Some interfaces are designed specifically for studio headphone monitoring, but most will have RCA or 6.35mm jack outputs on the back for sending audio out. Read more detail on how to connect your interface to studio monitors here.
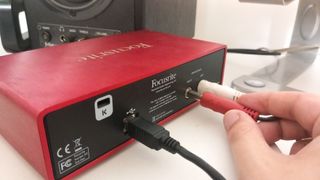
The audio that leaves your interface via these outputs will be ‘line level’ - much louder than the volume of signals from a microphone or guitar, but much quieter than signals which would drive speakers. As such, your signal will need to be amplified in order to be heard!
Most studio set-ups will use active monitor speakers to receive such signals, but you can also use a power amplifier with passive speakers. Whatever you have, make sure they are turned off until you’re all plugged-in, otherwise things could get noisy.
Your audio interface might have several outputs on the back, which can be used for multiple speaker setups or surround-sound. Commonly, these additional outputs are used for outboard processing - that is, to send signals out and through external rack equipment, before receiving and re-recording the altered signals back in.
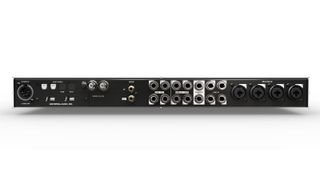
This requires some clever and careful routing in your DAW, to make sure you aren’t sending an entire ‘monitor out’ or ‘master channel’ signal through these ancillary outputs. If you’re not careful, you could create an ear-splitting feedback loop; others have made this mistake so you don’t have to…
Step 6 - Recording something!
With that, your new interface is all plugged-in, set-up and ready to go! All that remains is for you to use it. In your DAW of choice, create a track and assign it an input from your interface. Once you’ve plugged a studio microphone or instrument into your interface, record-arm your track and you should be able to see some signal coming in via the track’s level meter. Now, you’re ready to record!
A word about this author's setup
This writer’s Logic setup utilises a Focusrite Clarett 4Pre as its interface-brains, and makes judicious use the additional two outputs on the rear for funky audio processing. Besides the four pre-amped inputs on the front, the 4Pre’s extra ins and outs are all plugged into a patch bay. This patch bay is ‘normalled’, meaning signal will flow top-to-bottom if nothing is plugged in.
The four inputs are routed to automatically receive audio from an analogue mixing desk elsewhere in the room; if you want to put something between the mixing desk and interface, you need only patch it in! The outputs are left floating, but can be sent to whatever you’d like – including pedals and amps (using a re-amp box), the seen-better-days rack compressors below the patch bay, or even the aforementioned mixing desk’s line inputs for more colour.
"interface" - Google News
July 08, 2024 at 06:05PM
https://ift.tt/VLhzAPZ
How to set up a new audio interface - MusicRadar
"interface" - Google News
https://ift.tt/OHlCurG
https://ift.tt/PTgDavo
Bagikan Berita Ini


0 Response to "How to set up a new audio interface - MusicRadar"
Post a Comment